A paperless recorder's internal memory is not an archive. It is a buffer that overwrites itself silently, oldest record first, with no "memory full" warning. Everything that makes the instrument trustworthy — the trend you need three weeks from now, the alarm list that explains a shutdown, the power-down record that accounts for a gap in the curve — depends on one thing: the export routine you set up on the day of commissioning.
This article covers how data leaves the R72 (GT72R) touch color paperless recorder by USB, how files are named and read, what the automatic export does, and the media and firmware details that decide whether the routine still works in year three.
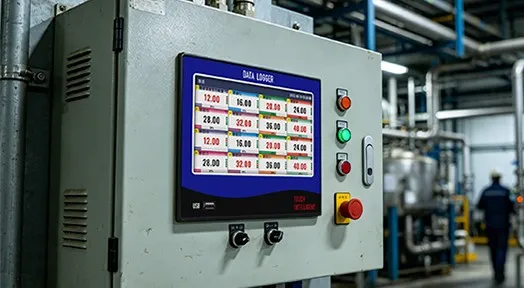
In service on a plant panel: the display is for the operators, but the export routine is what keeps the record.
What the Export File Actually Contains
Inserting a USB stick into the recorder automatically opens the data transfer interface. From there, all or part of the stored data can be transferred, and the resulting file is a single archive rather than four separate reports. It contains:
| Data set | What it answers |
|---|
| Historical trend data | What the process was doing, at the configured recording interval |
| Power records | When the instrument lost power, when it returned, and for how long — the explanation for any flat line in the trend |
| Alarm records | Which channel went into alarm, of what type, with what status, at what time |
| Operation logs | Who changed what on the instrument, and when |
That last pair is the reason a paperless recorder is worth the change from a paper chart. A pen that ran dry leaves an unexplained flat line. A recorder that lost power leaves a timestamped power-down record, a power-up record, a duration, and an operation log showing the restart. The instrument does not just record the process; it records its own condition. But only the export makes that record retrievable after the first 256 events, because the alarm list, power list and operation log are each stored circularly at 256 entries.
Manual Export: Step by Step
- Insert the USB stick. The transfer interface pops up automatically; if it does not, enter the USB Operation screen from the navigation bar.
- Choose all or part of the data. Partial export is useful when you only need the last shift; full export is the routine case.
- Wait for the transfer to complete before removing the stick.
- Open the file on a PC with PLR.EXE, the data management software supplied for this recorder family — the installation package is available on the USB flash drive itself.
The naming convention is deterministic, which is what makes automated sorting possible later:
device name + year + month + day + serial number
e.g.  01#(180904A).PLR
Files are written to the PLR folder at the root of the USB stick. The extension is .PLR, and the four data sets listed above travel together inside it.
One consequence of this naming scheme deserves attention before you have a dozen instruments: the leading element is the device name, which is populated from the instrument's Device ID setting. Leave that setting at its default and every recorder in the plant produces a file beginning 01#. Configure it deliberately and the same folder becomes self-documenting.
Automatic Export: Turning a Chore Into a Setting
The recorder supports a scheduled automatic export: set the automatic exporting time in the system configuration and the function triggers at that time point every day, dumping all data to the USB stick.
Two details decide whether this works in practice:
- The stick has to be present at the scheduled time. An automatic export to an empty port exports nothing. If the port is used for manual transfers too, adopt the discipline of returning the archive stick immediately.
- Somebody has to verify the output. A daily export is not a backup until a human has confirmed the file exists, has a plausible size and carries the current date. Once a week is usually enough, and it takes two minutes.
If the plant would rather not depend on a physical stick, the recorder can export the same data path over Ethernet through a Modbus-based collector instead, though the registers carry live values rather than history — see reading channel values over Modbus for what the network path does and does not provide.
Device ID: The Setting Nobody Touches Until It Matters
The Device ID is a 16-character field used for USB data export, which means it becomes part of every file name the instrument ever produces. A convention that survives staff turnover looks like this:
| Convention | Example | Why |
|---|
| Site — area — unit | L3-BOILER-A | Reading the file name tells you where it came from without a lookup table |
| No spaces, no slashes | L3-BOILER-A | Safe across file systems; the FAT32 target will reject some characters |
| Unique per instrument | L3-BOILER-A vs L3-BOILER-B | Two identical units on one line still sort apart |
| Recorded in the panel schedule | Panel drawing entry | The next engineer can find the instrument from the file name |
This is a five-minute task at commissioning and an archaeology project three years later if it is skipped. The same screen holds the configuration export and import functions, so configure the Device ID, then export the configuration file as your baseline.
FAT32, Stick Size and Media Hygiene
The recorder formats USB media to FAT32, and formatting erases everything already on the stick. The port is USB 2.0 and supports sticks up to 32 GB.
| Practice | Reason |
|---|
| Use small industrial-grade sticks (8–16 GB) | The supported maximum is 32 GB; larger media buys nothing and increases the chance of a stick being "borrowed" |
| Keep two sticks and rotate them | The stick that is not in the panel is the one that survives the loss of the panel |
| Reserve one stick for the recorder only | A stick that travels between a plant PC, a laptop and a control room collects files and, occasionally, malware |
| Scan the stick on an office PC before opening files | The archive is data, not an executable; treat it as an untrusted transfer medium |
| Label the stick physically | Matching a physical label to a Device ID takes seconds instead of a phone call |
None of this is exotic. It is the same discipline plants applied to chart paper storage, moved to a smaller medium with a shorter shelf life.
The Same Port Updates Firmware — Read This Part Before You Need It
Firmware updates are applied from the same USB port:
- Copy the new firmware file to the stick at the path
\PLR\K8.bin. - Insert the stick and execute the firmware update function.
- The system restarts automatically and applies the update.
The manual is explicit about one thing: do not cut the power during the upgrade process, or the recorder will be damaged. Practical sequence:
- Export all data first, so an archive exists if the update goes wrong.
- Export the configuration file as well, because a replacement or reverted unit needs it.
- Confirm the firmware file matches the model before starting.
- Keep the panel energised and warn operations that the display will restart.
- After the restart, verify the channel configuration against the exported baseline, then export a fresh configuration file.
A Routine That Survives Audits
| Frequency | Action | Failure it prevents |
|---|
| At commissioning | Set Device ID, set clock and time zone, export configuration | Every subsequent export being anonymous |
| Daily (automatic) | Scheduled export to the archive stick | Silent overwrite of the oldest records |
| Weekly | Verify file name, size and date; return the stick to the port | A silent failure in the export path |
| Monthly | Copy the file to the network share and the backup target | Loss of the panel, the stick and the record at once |
| Quarterly | Open one file in PLR.EXE and check all four data sets are present | Discovering at audit time that the file cannot be read |
| After any change | Re-export the configuration | Rebuilding 32 channels of setup by hand |
| Before any clear | Export first — the clear-history and factory-reset functions erase stored data | Irreversible loss |
How Export Discipline Changes Your Recording Interval
Here is the part that connects the routine to the specification, and the reason export scheduling should be decided before the instrument is ordered.
If the archive lives off-panel, the on-board memory only has to cover the export interval plus a safety margin:
required on-board retention (days) > export interval (days) + safety margin (days)
On this 64 MB platform, retention scales as roughly 320 × recording interval (s) ÷ channel count days. A 12-channel line at a 1-second interval retains about 26 days, so a weekly export still leaves roughly 19 days of margin — which means you can choose the fast interval for resolution and let the export routine carry the retention requirement. The full calculation, with the channel and interval trade-offs, is in how to choose a paperless recorder.
That is the practical argument for automating the export: without it, the retention calculation has to be sized for how long a human might forget, which is not a specification anyone can defend.
Common Mistakes
- Treating internal memory as an archive. Cyclic overwrite is silent; nothing warns you before the oldest record is gone.
- Leaving the Device ID at its default, so every instrument produces files beginning
01#. - Setting the automatic export time without leaving the stick in the port.
- Never verifying the automatic export. An unverified routine is a hope, not a backup.
- Using one stick for the recorder and everything else, including plant PCs and laptops.
- Updating firmware without exporting the data and the configuration first — and without reading the power warning.
- Using "clear historical data" or "factory setting" as a housekeeping step. Both erase stored records; export before, not after.
Frequently Asked Questions
Q: How do I export data from a paperless recorder?
A: Insert a USB stick into the front port and the transfer interface opens automatically, or enter the USB Operation screen from the navigation bar. Choose all or part of the stored data and let the transfer complete. The file is written to a PLR folder at the root of the stick and opened on a PC with the PLR.EXE software supplied with the recorder.
Q: What is inside a .PLR file?
A: Four data sets travel together in one file: historical trend data at the configured recording interval, power records (power-down time, power-up time and duration), alarm records with channel, type, status and time, and the operation log. That is why one file is enough to explain both the process behaviour and the instrument's own interruptions.
Q: How are the export files named?
A: Device name plus year, month and day plus a serial number, for example 01#(180904A).PLR. The device name comes from the 16-character Device ID setting, so configuring a site, area and unit convention turns an anonymous folder into a self-documenting archive.
Q: Can the recorder export automatically?
A: Yes. Set the automatic exporting time in the system configuration and the function triggers at that time point every day, dumping all data to the USB stick. Leave the archive stick in the port, and verify weekly that the newest file exists with a current date and a plausible size.
Q: What USB media does it accept?
A: USB 2.0, with support for sticks up to 32 GB formatted FAT32. The instrument can format a stick itself, and formatting erases everything already on it. Small industrial-grade media is adequate and easier to manage than a large drive shared with other duties.
Q: Can I update the firmware from the USB port?
A: Yes. Copy the firmware file to \PLR\K8.bin on the stick, insert it and run the firmware update function; the system restarts and applies the update. Do not cut the power during the upgrade process, because interruption can damage the recorder. Export your data and configuration first.
Q: Does clearing history or restoring factory settings delete data?
A: Yes. Resetting parameters clears the stored historical data along with the settings, and the clear-historical-data function erases records on its own. Export the data first and keep a configuration file, because neither operation is reversible from the panel.
Q: Can I export only part of the data?
A: Yes. The manual export interface allows all or part of the data to be transferred, which is useful when you need one shift, one batch or one alarm window rather than the full buffer. Partial exports use the same file format and the same PLR folder, so they land alongside full exports.
Building an Export Routine for Your Line?
If you tell us how many recorders are on site, how often the data has to be available off-panel and who needs to read it, we can propose a Device ID convention, a stick rotation and a retention setting that keeps the archive complete without shortening your recording interval.
Ask us to review your export routine · PLR data management software
About the Manufacturer
This guide is published by Jujie Automation (Anhui Jujie Automation Technology Co., Ltd.), a National High-Tech Enterprise founded in 2016 and specializing in process measurement and automation instrumentation for 10+ years. Our product portfolio covers flow meters, pressure and temperature instruments, level instruments, water quality analyzers, recorders and turnkey control systems — manufactured in our own plant in Wuhu, Anhui, and calibrated in our in-house calibration laboratory with traceable data on every unit.
Quality and compliance: ISO 9001, ISO 14001 and ISO 45001 management systems, CE, RoHS, TUV and SGS certification, and a five-stage quality process that includes 100 % incoming material inspection, individual calibration, 72-hour burn-in under temperature extremes and EMI stress, and a unique serial number for full lifecycle traceability. Products are in service with more than 350,000 customers across 160+ countries, backed by an 18-month warranty, a one-hour response commitment and lifetime maintenance support.
Editorial note: file naming, export screen behaviour, automatic export, USB and FAT32 limits, firmware update path and the clear-history warnings are taken from the R72 touch color paperless recorder user manual. Media hygiene and archive routine recommendations are engineering practice, not instrument specifications.
Ethan Liu
Ethan Liu is JUJEA's technical content specialist, translating complex sensor integration and industrial automation concepts into practical insights for engineers, system integrators, procurement professionals, and decision-makers worldwide.


 한국어
한국어 français
 Deutsch
 Español
 italiano
 русский
 português
 العربية
 tiếng việt
 čeština